Tuesday, June 28, 2011

Controlling the Way Text Flows

After you’ve converted your eBook to tagged PDF, you may discover that the page elements don’t flow properly, especially when the page is viewed on a smaller screen. For example, a text caption for a graphic might appear above the image rather than below it. In other cases, you might have an image that has a text wrap around it, but you want to have the image appear after the text when it is reflowed. In such cases, you can use the TouchUp Order tool in Acrobat 6 to edit the reflow order of tagged items in the document. The TouchUp Order tool is located on the TouchUp Text Tool pop-up menu. You can select the tool by either choosing it from this pop-up menu or by holding down the Shift key and tapping the T key to cycle through the TouchUp tools until the TouchUp Order tool appears.
To change the reflow order of elements on a tagged PDF page, follow these steps:
  1. Open the eBook file and navigate to the page containing the elements for which you want to change the reflow order.
  2. Choose View➪Navigation Tabs➪Content to open the Content Navigation pane. The Content Navigation pane displays the content structure tree of your eBook document. When you click the Expand button (+) attached to your eBook icon, the pages of your eBook appear on the next level with Expand buttons of their own. Clicking these buttons displays containers that hold the separate elements on the page in the order that they appear in your eBook document. You can then drag the page elements either individually or their whole container to new positions in the structure tree to reorder the page elements.
  3. Drag the desired page element or container to a new position in the page structure tree. As you drag a page element or container, the mouse pointer changes between an International No symbol and a red downward arrow, indicating the positions you can or cannot drop the desired page element when you release the mouse button. A red underscore mouse pointer is displayed to indicate you are moving an element to an upper-level position.
  4. Repeat Step 3 until you’re satisfied with the reordering of the eBook page elements, and then click the Close button to close the Content Navigation pane.
  5. To view your reflow order changes first, choose View➪Reflow or press Ctrl+4 (Ô+4 on Mac). Use the Zoom In and Zoom Out buttons to observe how the elements reflow under different page magnifications.

Using Link Properties options

The Link Properties toolbar, like all Properties toolbars in Acrobat 6, pops up when you select an editing tool. This toolbar lets you specify the appearance of a link and what action occurs when you click the link. As you can see each button on the Link Properties toolbar has a pop-up menu button (black triangle) attached for selecting the following options:
  • Color: Click the Color button to choose a color for the link border on the palette that appears.
  • Line Style: Click the Line Style pop-up menu to select No Line, Solid, Dashed, or Underline border style.
  • Line Thickness: Click the Line Thickness pop-up menu (marked by either 1pt, 2pt, or 3pt line sizes in the Link Properties toolbar) and choose a Thin, Medium, or Thick outline border for the link.
  • Highlight Style: The Highlight Style pop-up menu lets you specify a momentary change in appearance for a link when the user clicks it. The effect is displayed until the user releases the mouse button. These options are available for both visible and invisible links. Choose None to have no change in appearance, Invert to invert the colors of the link, Outline to highlight the border on a visible link or to display a thin line around an invisible link, or Inset to create a 3-D button effect.
  • More: Opens the Link Properties dialog box with the Actions tab selected. Choose from the 16 options in the Add an Action drop-down list, which define an action that occurs when the user clicks a link. The Go to Page in the Document option is the default and is used for internal links. The other choices on this list are used to perform a variety of actions when a link is activated, such as opening a file, playing a sound or movie, or running a JavaScript. he majority of the actions are either impractical or not appropriate for eBook use

Tuesday, May 31, 2011

Adding an internal link


You create all links with the Link tool, which is found on the Advanced Editing toolbar. To select the tool, click its button on the toolbar or press L.
To add an internal link to your eBook, follow these steps:
  1. Open the eBook file and navigate to the page in which you want to add a link.
  2. Select the Link tool and use its cross-hair pointer to draw a rectangle in the area of the page you want users to click to activate the link, and then release the mouse button. The Create Link dialog box opens, as shown in Figure. When you select the Link tool, any links currently in the document temporarily appear even if they are hidden. The Link Properties toolbar also opens, as shown in Figure. See the next section for details on the options provided in this toolbar.
  3. In the Link Actions area of the Create Link dialog box, select the Open a Page in This Document radio button, enter the page number for your link’s destination page in the Page text box, and select a Zoom setting from the Zoom drop-down list. The zoom settings determine how the destination page is displayed in the PDF reader after clicking a link and are the same as those provided in Acrobat 6 — Fit Page, Actual Size, Fit Width, Fit Visible, and Inherit Zoom, which uses the same view setting for the destination page as the page containing the link.
  4. Select the Open a File radio button to have the link open an external file. Click the Browse button to locate and select the file. If the file is not a PDF document, those who click this link must have the associated program installed on their computers to view the file.
  5. Select the Open a Web Page radio button and type a URL address in the Address text box. See the “Adding an external link” section, later in this chapter, for more on this option.
  6. Select the Custom link radio button to create a link with JavaScript actions attached to it, such as playing a sound file or movie clip. These actions are specified in the Link Properties dialog box. See the next section for more about the Link Properties dialog box.
  7. Click OK to close the Create Link dialog box and test your new link.
You can also use the Hand tool to test the link. Note that when you hover the Hand tool pointer over a link, it changes to a pointing finger.

Managing PDF Links


Hyperlinks add interactivity to an eBook by providing a means of navigating to desired information quickly and easily. Using links, an eBook reader can jump to a different place in the current page, call up other pages in the eBook, and even retrieve other documents on a network or download pages from the World Wide Web. When you create a link in Acrobat 6, you define an area in the document for the link, choose whether it appears visible or invisible to the user, and specify what occurs when the user clicks the link. Acrobat 6 lets you create internal links that navigate to destinations in the current document —a table of contents link, for example — as well as external links that retrieve other documents on a network or Web pages from the Internet. One of the main goals in using an eBook authoring program that can export its documents to PDF is that the majority of links you might need in your eBook can be set up in the authoring program and automatically converted to PDF during the export process. There are times, however, when you’ll want to edit those export-generated links or add new links to your eBook. The following sections take you through the process.

Adding a library thumbnail graphic to your PDF eBook


After you’ve created your Library cover thumbnail, you need to attach it to your eBook in order for it to appear in My Bookshelf in either Adobe Reader or Acrobat 6. Here’s how:
  1. Open the eBook file and select the cover page graphic in the Pages palette (it should be the first page in the document) and then reduce the magnification so that the work area surrounding the page is visible. A magnification of 75% usually works well for this with a screen resolution of 800 x 600.
  2. Select the Attach File tool located on the Advanced Commenting toolbar. You can also hold down the Shift key while pressing the S key to cycle through the tools found on this menu. The cursor changes to a paperclip icon.
  3. Click in the workspace surrounding your cover page (not on the cover page itself), and in the Select File to Attach dialog box (Windows) or the Open dialog box (Mac) that appears, locate and select your Library thumbnail graphic, and then click the Select button. The File Attachment Properties dialog box appears.
  4. Accept the default settings for your attachment and click OK.
A paperclip icon appears in the workspace next to the cover page, as shown in Figure. Make sure that the paperclip is in the workspace and not on the cover graphic page. After you’ve attached your Library thumbnail graphic, you can open My Bookshelf in Adobe Reader or Acrobat 6 by choosing File➪My Bookshelf to view the thumbnail, as shown in Figure.

Thursday, April 28, 2011

Adding a cover graphic to your PDF eBook


Because an eBook cover graphic is designed to fill the Acrobat eBook Reader window, it’s nearly impossible to add this graphic to your eBook in a layout program, let alone a word processor, and achieve satisfactory results. Imagine placing a 300 dpi graphic that covers the entire page (beyond the margins) into a document created in your favorite layout program and then hoping that Distiller will compress it nicely for full-screen display in the eBook Reader. It’s best to create the graphic separately and use Acrobat 6 to insert it into your eBook after it has been exported PDF. Here’s how:
  1. Open the tagged PDF eBook file you exported from your layout program.
  2. Choose Document➪Pages➪Insert.
  3. Locate and select your JPEG cover image in the Select File to Insert dialog box and click the Select button. (Note that you may have to choose JPEG in the Files of Type drop-down list to see your graphic in the dialog box window.) The Insert Pages dialog box appears. This dialog box lets you choose where in the eBook file you want the eBook cover graphic to appear. Luckily in this case, the default is before the first page in the document, which is where you want your eBook cover graphic to appear.
  4. Click Before in the Location drop-down list, and then click OK. The cover image is imported into the PDF file as the first page in the document.
  5. Click the Pages palette tab to verify the location of the cover graphic at the beginning of the eBook document.
  6. Note that because the cover graphic was appended to the beginning of the document, it was automatically given the first page number in the PDF. You can resolve this issue by choosing Number Pages on the Options pop-up menu at the top of the Pages palette.
Acrobat lets you renumber pages, as well as change numbering formats one section at a time, so that you can make sure the numbers you created for your eBook pages correspond to page numbers that appear in the page navigator bar in Acrobat eBook Reader.
Whenever you convert a document to PDF that is either a multisection book with different numbering schemes or a single document that starts with a page number other than the number one, you must use the Number Pages command in Acrobat 6 to renumber the PDF so that its page numbers mirror your original document’s numbering scheme.
When you add a front cover graphic to your Adobe eBook, it’s important to insert an inside front cover page, though this page could be blank as well. Also, make sure that you end up with an even number of front-matter pages, using a blank page at the end of the front matter if needed. This ensures that your Adobe PDF eBook displays properly in Adobe Reader 6 and Acrobat 6, when viewing two pages at a time (by using the Facing Pages view), with odd-numbered pages on the right.

Designing Library and Cover Graphics


You can definitely integrate graphics and digital photos into the design of your Adobe eBooks, especially those you create solely for viewing in Acrobat eBook Reader, Adobe Reader, or Acrobat 6. Because there is no added expense for color use in an eBook (as there is with printed books), you can feel free to embellish your eBook with colored text, borders, and fills. In addition to the graphics you might use to illustrate your eBook, you also need to consider the use of library and cover graphics. There are three different kinds of library and cover graphics: your actual eBook cover and two thumbnail versions of the eBook cover. Although none of these graphics are required to create a functioning eBook, they add to the overall look and feel of your eBook and are required if you plan to market your eBook commercially.
When specifying color conversion settings in either the Distiller or the export settings of your eBook authoring program, always choose the sRGB model. Because computer screens use the RGB model, this device-independent color setting ensures that the graphics and colors in your eBook appear accurately in a wide variety of displays.
The Cover thumbnail is used for marketing purposes when you distribute your eBook online. E-book sellers use the Cover thumbnail on their Web sites to identify and advertise your eBook. The Library thumbnail is displayed in the Acrobat eBook Reader Library, as well as the My Bookshelf feature in Adobe Reader 6 and Acrobat 6, and is used as a navigation button for selecting and opening an eBook. The actual eBook cover graphic is set as the first page in your eBook in Acrobat 6 and appears full screen (momentarily) in Acrobat eBook Reader when a user double-clicks the library thumbnail graphic to open the eBook. You can create these graphics in any editing program, though recent versions of Photoshop (5.0 and up) have the advantage of using the sRGB color model as a default.
Here are the basic specifications for these three graphics:
  • Cover thumbnail: Create a thumbnail of your cover graphic in GIF format. The image should be 100 pixels wide. A 3:2 aspect ratio works well, so at that width, your image would be 150 pixels tall by 100 pixels wide. Make sure to adjust the image resolution to 96 dpi, so that the thumbnail display is sharper with fewer artifacts or pixel distortions when viewed online in a Web browser.
  • Library thumbnail: The image that appears in the Acrobat eBook Reader Library is slightly different than the Cover thumbnail. For this graphic, create a thumbnail of your cover graphic in JPEG format. The image should be 100 pixels wide with the same 3:2 aspect ratio as the Cover thumbnail. Make sure to use the sRGB color model if possible (RGB otherwise) and adjust the image resolution to 96 dpi.
  • eBook cover: You should also create your eBook cover in JPEG format. To fill the Acrobat eBook Reader window, it should be 600 pixels tall and 400 pixels wide, using sRGB color and 96 dpi image resolution.
The graphics and illustrations you create for the body of your eBook can be developed in any graphic or photo editing program, such as Illustrator or Photoshop. When you export your eBook to PDF, these graphics are optimized for viewing via the Distiller job option you choose during the export process. Because the Library and cover graphics are added to your eBook in Acrobat 6 after it has been exported or converted to PDF, make sure to create GIF and JPEG format graphics and use the sRGB color model so that they are fully optimized for the Web when you upload the cover thumbnail to a bookseller’s server or insert the cover and Library thumbnail in your eBook.

Converting FrameMaker 7.0 documents to PDF


FrameMaker is much like PageMaker, in that you can create linked tables of content and indexes, as well as compile book publications from separate documents. It’s designed to create long, content-rich documents and also comes in a version (FrameMaker SGML) that lets you publish complex documents in Standard Generalized Markup Language, which is a required format in some industries. The good news is that FrameMaker 7.0 now supports the export of tags to Adobe PDF. Like InDesign and PageMaker, you can now easily create a tagged PDF eBook from within the program. When you’re ready to convert a FrameMaker 7.0 eBook document to PDF, follow these steps:
  1. Choose File➪Save As; in the Save As dialog box, select PDF from the Save As Type drop-down list. Enter a name for the eBook file and click the Save button to open the PDF Setup dialog box.
  2. In the PDF Setup dialog box, select Settings from the drop-down list; in the Settings panel, choose eBook from the PDF Options drop-down list.
  3. To generate bookmarks in your eBook, choose the Bookmarks panel in the PDF Setup dialog box and select the Generate PDF Bookmarks check box. Note that these bookmarks are based on the paragraph styles in your FrameMaker document. If you’ve already created an internally linked Table of Contents, these bookmarks serve as an additional navigation device when your eBook is viewed in Adobe Reader 6 or Acrobat 6.
  4. Click Tags on the Setup PDF drop-down list to display the Tags panel, and then select the Generate Tagged PDF Bookmarks check box. This option ensures that your PDF eBook text can be reflowed when viewed on smaller devices, such as handhelds or cell phones.
  5. Click OK to close the PDF Setup dialog box and generate your Adobe PDF eBook.

It’s not the end of the world if your program doesn’t export its documents to tagged PDF files. You can still add internal and external interactive links to your document in Acrobat 6, as you find out later in this chapter, and Windows users have the added ability to use Acrobat’s Make Accessible plug-in to scan their PDF files and create tags that allow the document text to reflow. The plugin is designed to create tagged files out of older PDF files so that they can be used in screen-reading programs for the visually challenged. Users of Acrobat 6 for Windows can download the plug-in at:
www.adobe.com/support/downloads/detail.jsp?ftpID=1161
There is not, as yet, a Make Accessible plug-in for Acrobat 6 for Macintosh (somebody write Adobe a letter!). After you’ve downloaded and installed the plug-in, open your PDF file in Acrobat and choose Document➪Make Accessible. The utility scans your document’s formatting structure, and if enough structure is available, it converts that information to reflowable tags.

Wednesday, March 30, 2011

Converting QuarkXPress 5 documents to PDF

QuarkXPress 5 does not provide the export to tagged PDF feature for its documents that are converted to PDF.
You can also get information about the PDF Filter XTension utility that integrates Distiller options into Quark. Otherwise, to convert a Quark 5 file to Adobe PDF, follow these steps:
  1. Open the document you want to export and choose File➪Page Setup or File➪Print. The Print dialog box appears.
  2. Choose Acrobat Distiller (Windows) or Create Adobe PDF (Mac) on the Printer drop-down list.
  3. Select the eBook job option on the PDF options drop-down list.
  4. Click the Print button.

Using InDesign 2.0 to create tagged PDF files


The latest version of InDesign is a feature-rich hybrid of layout and graphics editing programs. To date, it has the most advanced integration of Distiller properties of any Adobe program and allows complete configuration within the program. It also has the advantage of directly opening Quark 3.3–4.1 and PageMaker 6.5–7.0 documents. InDesign 2.0 is a great tool for designing and developing eBooks because of its extensive PDF conversion tools, and for Mac users, OS X and Acrobat 6 compatibility. But for this overview, here are the simple steps for exporting a document to tagged PDF:
1. Open the document you want to export and choose File➪Export. The Export dialog box opens.
2. In the Save as Type (Windows) or Formats (Mac OS) drop-down list, choose Adobe PDF.
3. Type a name for the converted PDF file, select a location on your hard drive, and click Save. The Export PDF dialog box opens.
4. In the Export PDF dialog box, shown in Figure above, select an export style from the Style drop-down list. To edit a selected style, choose the panel names on the left side of the dialog box and go to town.
5. Click the Export button.

What about other layout programs?

As mentioned earlier, InDesign 2.0 is capable of converting its documents to tagged PDF, and the process is similar to the export function in PageMaker 7.0. It also has the added advantage of having Mac OS X and Windows XP versions, so there are no problems exporting documents directly to PDF in Acrobat 6. The following sections provide an overview of this program, as well as FrameMaker 7.0 and Quark 5, should you prefer using those authoring programs to create your eBook, rather than PageMaker. Acrobat Distiller 6.0 does not provide the ability to specify the exporting of tags to PDF as part of configuring its job options. All layout programs, whether they are Windows or Mac OS versions, perform the conversion of documents to PDF by using either a Save as PDF, Export to PDF, or Print to Distiller type of command. The Save As and Export to PDF commands allow you to choose or edit Distiller job options right inside the program, and Adobe has only recently integrated the export tags feature within those programs listed at the beginning of this chapter. Older versions of these programs do not have this capability, and this is also the case with programs such as QuarkXPress 5 and FrameMaker 6.0 that use the Print to Distiller command for converting their documents to PDF.

Friday, February 25, 2011

Specifying PDF options for eBooks


The PDF Options dialog box in PageMaker contains five tabs of options for configuring the way your eBook publication is exported to Adobe tagged PDF. Many of the options add functionalities that are specific to electronic publishing, such as setting up document information metadata that can be used as search criteria. The printing options don’t really apply to eBooks, because they will most likely stay in their electronic form. The following list describes these tabs and their options:
_ General: Make sure to select the Embed Tags in PDF (for Accessibility and Reflow) check box. This is the only way to specify that your eBook be converted to tagged PDF. To use a preconfigured Distiller job option, select from the Job Name drop-down list. Click the Edit Job Options button to make changes to the selected job. To find out more about Distiller job options.
Choose one of the appropriate radio buttons in the Pages area to either export all the pages in a Book publication, all the pages in the current single publication, or a range or ranges of pages in the current publication. Select Same as Current Publication from the Paper Size(s) drop-down list to send the optimized PageMaker document settings you specified for your eBook to PDF. If you created separate document settings, choose Apply Settings of Each Publication. Leave the Style as Acrobat and the Check for PageMaker Printer Style Conflicts check boxes selected, which are the default settings; these options don’t affect your eBook.
  • Doc. Info: Information entered in the Doc. Info tab appears as metadata in the document properties of the tagged PDF file. For this reason, it can also be used as search criteria. You can specify the author, title, subject, and keywords of a document and create a note that appears on the first page of your PDF document that might contain an introduction or instructions for your PDF file. For more info on searching and cataloging a PDF file.
  • Hyperlinks: These commands let you specify the links you want to activate in your eBook and their appearance and magnification after conversion to PDF. Select all applicable link types in the Export Links area. If you haven’t defined these types of links in the PageMaker publication, the check box will be grayed out. Choose the Type, Highlight, Width, Color, and Style of your hyperlinks in the Default Appearance area. Note that most of these settings are more appropriate for PDF documents other than eBooks. Choose Fit Page in the Magnification drop-down list to have your linked destination page fit in the Acrobat eBook Reader window. Note that you can add, delete, and edit hyperlinks in Acrobat 6 after you’ve converted your eBook.
  • Articles/Bookmarks: PageMaker allows you to export text stories as PDF articles. It automatically finds these when you use the export command, and you can also define your own within the PageMaker story by clicking the Define button in the Articles area. If you’ve created index or table of contents links in your publication, you can convert these to PDF bookmarks by selecting the appropriate check box in the Bookmarks area. Select the Fit Page setting from the Magnification drop-down list to have your bookmarked destination page fit in the Acrobat eBook Reader window.
  • _ Security: You can select security settings for a PDF document, such as limiting access by assigning passwords and restricting printing and editing. Use these settings if you don’t plan to distribute your eBook commercially through an online retailer or distributor. Note that if you do plan to market your eBook, you must leave these settings blank because security for commercial eBooks is determined as part of the distribution process.
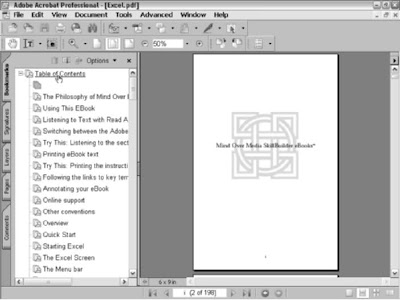
When the export job is finished, your new, tagged PDF opens automatically in Acrobat 6 for viewing. The first page of the document is displayed (in this case, the inside cover page of my Excel SkillBuilder eBook), and the Bookmarks palette shows the table of contents headings that were converted to PDF bookmarks. You can now test your links and use Acrobat’s PDF editing features to make final adjustments to your eBook. As of this writing, PageMaker 7.0 for Macintosh only runs in Classic mode on OS X. You can create an eBook as described in the previous sections, but when it comes time to exporting it to Acrobat, you’ll run into problems because Acrobat 6 only runs under OS X version 10.2.2 or greater. If you have Acrobat 5, start up in OS 9 and create your eBook in PageMaker 7.0 from that environment. When it comes time to export your eBook to Acrobat, do so using Distiller 5.0, save the eBook, and then open it in Acrobat 6 from the OS X environment. If you have InDesign 2.0, which is OS X and OS 9 compatible, you could convert your PageMaker eBook document with that program (or better yet, build your eBook in that program to start with), and then export the InDesign eBook document directly into Acrobat 6 under OS X.

Creating a tagged PDF file


When you’re satisfied with the look and feel of your eBook, your final step is to export the publication and its tags to PDF. The following steps show you how to export your PageMaker publication to PDF, which can then be opened up in Acrobat 6 for final adjustments prior to distributing your eBook:
  1. In PageMaker, open the publication you want to export to PDF. Note that if you’ve compiled your PageMaker publications into a book, you need to open the first publication in your Book List. This should be some element of the front matter, such as the table of contents. The Book utility takes care of sending the parts of your book in their correct order to Acrobat 6.
  2. Choose File➪Export➪Adobe PDF. Acrobat takes a few moments to configure itself for this task and then opens the PDF Options dialog box.
  3. Select options in the PDF Options dialog box. See the next section for details on specifying options that pertain to eBooks when exporting them to tagged PDF in PageMaker.
  4. Click the Export button to send your publication to Acrobat 6.

Using mixed page-numbering schemes


The main reason for using PageMaker’s Book utility to combine separate sections of your eBook is that doing so enables you to create different numbering schemes for those parts. A typical example is the way printed books use Roman numerals for their front matter (copyright, title, acknowledgment, and table of contents pages) and Arabic numerals for the body. Some books will also use different number formats for their appendixes and index.
PageMaker allows you to renumber pages in a single publication but not change their format, which works well for many types of publications. As an eBook publisher, though, it’s nice to know you can add these little details to re-create the look and feel of printed books.
To apply a different number format to one of your eBook publications, follow these steps:
  1. Open the publication you want to reformat in PageMaker.
  2. Choose File➪Document Setup, and in the Document Setup dialog box, click the Numbers button. The Page Numbering dialog box opens.
  3. Click one of the five radio buttons to select a numbering format and then click OK.
  4. Click OK to close the Document Setup dialog box and view your newly formatted page numbers in the document.
You can apply these steps to any other eBook sections as desired. The beauty of the PageMaker Book utility is that it compiles your eBook sections in the order in which they appear in the Book List and, at the same time, preserves all your links when you export the eBook to PDF.

Thursday, January 27, 2011

Generating a TOC in Pagemaker


You can create a table of contents from those heading styles that are marked for inclusion in your PageMaker publication. The TOC can reside in the same document as your eBook body or in a separate publication for use with PageMaker’s Book utility. I cover both methods in the following steps for creating a table of contents with hyperlink tags that can be exported to Acrobat.
To create a table of contents in the same publication as your eBook body, follow these steps:
  1. In PageMaker, select the first page in your publication and choose Utilities➪Create TOC. The Table of Contents dialog box.
  2. Type a new title or accept the default “Table of Contents” title in the text box provided and select one of the radio buttons in the Format area to specify the appearance and position of page numbers in the TOC. You can also specify a special character to appear between the entry and the page number (a tab space is the default) here.
  3. Click OK to generate your table of contents story. A story in PageMaker terms is an independent text object with unique formatting that can be positioned anywhere in a page layout. The mouse pointer changes to the story flow cursor. Now you need to create empty pages in which to flow your TOC story.
  4. Choose Layout➪Insert Pages and enter the desired number of empty pages you want inserted, select Before the Current Page from the drop-down list, and click the Insert button.
  5. Go to the first of your newly inserted pages and click to flow your TOC story onto the empty pages from there.

To create a table of contents in a separate publication from your eBook body, follow these steps:
  1. Create a new document from your eBook template containing the desired number of pages for your TOC and then save and name the publication.
  2. Choose Utilities➪Book. The Book Publication List dialog box opens, This dialog box is used to specify the order of the publications you want to include in your book. Your current TOC document appears in the Book List on the right side of the dialog box.
  3. In the list on the left, locate the documents you want to include and add them to the Book List by clicking the Insert button located between the two lists. Click OK to save your changes. You can remove files and change the order of files in the list using the appropriate buttons.
  4. Choose Utilities➪Create TOC. The Table of Contents dialog box opens.
  5. Type a new title or accept the default “Table of Contents” title in the text box provided and select one of the radio buttons in the Format area to specify the appearance and position of page numbers in the TOC. You can also specify a special character to appear between the entry and the page number (a tab space is the default) here. Note that when you’re creating a TOC from a document listed in a book publication, the Include Book Publications check box is automatically selected.
  6. 6. Click OK to generate your table of contents story; then go to the first page of your TOC publication and flow your TOC story from there.
Your brand-new table of contents contains tagged hyperlink entries that will produce accurate bookmarks and page references in your eBook when converted to PDF and viewed in Acrobat. You can check your links in PageMaker by selecting the Hand tool on the floating toolbox. PageMaker inserts a text marker in front of every entry in the placed table of contents story in order to create hyperlink tags that will function when exported to tagged PDF. These text markers are visible only in story editor, (PageMaker’s text editing window) and if they are removed, the links will not operate. For this reason, if you are editing a TOC entry, be very careful not to press the Delete key when the insertion point is directly in front of a TOC entry or page-number reference, because this will remove the text marker from the publication. Your only recourse in such an event is to either close and reopen the document without saving (if you haven’t saved the changes already) or regenerate the TOC.
You can make text edits to your TOC entries (heeding the warning in the preceding paragraph), but if you decide to add any new entries in either the TOC or the body of your eBook, you will have to regenerate a new TOC to create links for those entries that will export to tagged PDF.

Setting up your eBook document in Pagemaker


The following list provides a number of important tips to utilize that will ensure high-quality output when you convert your eBook to tagged PDF. Some of the items deal with conversion settings that you specify in Acrobat Distiller prior to exporting your eBook document to PDF.
  • When creating eBook content in PageMaker or any other layout program, make sure to set up a smaller page size so that your text won’t be distorted when rendered in the smaller screen area provided by your eBook reader of choice. A 6-x-9-inch page dimension with 1⁄2- or 3⁄4-inch margins all around translates well to desktop and laptop screen resolutions.
  • Target output resolution should be 300 dpi or better to ensure clear, crisp text when the file is down-sampled and compressed during the PDF conversion process.
  • Try to use your system’s Base 14 fonts in your eBook document. Otherwise, choose fonts that have strong serifs and strokes. If these font properties are too delicate, they’ll distort and cause reading difficulty when displayed in the Adobe Reader or Acrobat. In addition, be sure to embed those fonts you decide to use in the converted PDF. You can experiment with the readability of a chosen font by converting a test document to PDF and viewing it in Acrobat or Adobe Reader using a variety of magnifications and CoolType settings. You might also check for differences when viewing the eBook on a CRT or LCD computer screen.
  • The minimum font size for body text should be 12 points. Use at least 2 points of leading. If you want to spread out your text, select a wider tracking value for your chosen font rather than using character kerning. Tracking can be applied globally and produces more significant visual enhancement than kerning, which also bulks up the size of your file.
  • When creating paragraph heading styles in PageMaker, make sure you specify their inclusion in your table of contents by clicking the Include in Table of Contents check box in the Paragraph Specifications dialog box. You can open this dialog box by selecting the heading text in your document and choosing Type➪Paragraph or pressing Ctrl+M (Ô+M on the Mac). You can also access this dialog box while editing styles. Choose Type➪Define Styles, select a heading style in the Style list box, click the Edit button to open the Style Options dialog box, and finally, click the Para button.

Four things to consider when optimizing e-books for mobile devices


Graphic size and page layout are definitely restricted by the screen size of handheld devices, so it’s better to develop eBooks that you want to view on those devices in Microsoft Word, which is text-based and has Acrobat 6 features built in that enable you to create tagged PDF files with the click of a button. Here are a few considerations to take into account in order to optimize eBooks designed for Palm OS or Microsoft Pocket PC handheld devices:
  • Graphics: With handheld device screen resolutions running between 320 x 320 for Palm OS devices and 320 x 240 for Pocket PC devices, graphics must be optimized for the target screen size if they’re used at all. Note that while the majority of Pocket PC and newer Palm devices in use have color screens, many more older Palm devices are out there right now without color. You could consider preparing your graphics in grayscale (thus creating a smaller file) for this reason.
  • Fonts: Use the common Base 14 system fonts that are installed on your computer. These typefaces have been optimized for on-screen viewing and produce the best results when viewed on a handheld device.
  • Paragraphs: Separate paragraphs with an additional hard carriage return for clearer visibility on the Palm handheld screen.
  • Conversion settings: For grayscale Palm handheld devices, Adobe suggests some slight changes to the eBook job option in the Acrobat Distiller.
Adobe currently offers three free versions of Adobe Reader for hand-held devices that support Palm OS, Pocket PC, or Symbian OS (which runs on Nokia Communicator devices).
The Acrobat Readers are applications that are installed on their respective handheld devices and are designed to accommodate their specific screen characteristics. In addition to the reader software, the PocketPC and Symbian OS versions includes a Windows desktop application for preparing and transferring a PDF to a user’s handheld device. The Palm OS reader includes a desktop application for both Macintosh and Windows and a HotSync conduit. To handle synchronization, the Pocket PC version includes the ActiveSync filter, which has an added feature that attempts to create tags from untagged PDF files prior to uploading them to the Pocket PC handheld device.