Friday, February 25, 2011

Specifying PDF options for eBooks


The PDF Options dialog box in PageMaker contains five tabs of options for configuring the way your eBook publication is exported to Adobe tagged PDF. Many of the options add functionalities that are specific to electronic publishing, such as setting up document information metadata that can be used as search criteria. The printing options don’t really apply to eBooks, because they will most likely stay in their electronic form. The following list describes these tabs and their options:
_ General: Make sure to select the Embed Tags in PDF (for Accessibility and Reflow) check box. This is the only way to specify that your eBook be converted to tagged PDF. To use a preconfigured Distiller job option, select from the Job Name drop-down list. Click the Edit Job Options button to make changes to the selected job. To find out more about Distiller job options.
Choose one of the appropriate radio buttons in the Pages area to either export all the pages in a Book publication, all the pages in the current single publication, or a range or ranges of pages in the current publication. Select Same as Current Publication from the Paper Size(s) drop-down list to send the optimized PageMaker document settings you specified for your eBook to PDF. If you created separate document settings, choose Apply Settings of Each Publication. Leave the Style as Acrobat and the Check for PageMaker Printer Style Conflicts check boxes selected, which are the default settings; these options don’t affect your eBook.
  • Doc. Info: Information entered in the Doc. Info tab appears as metadata in the document properties of the tagged PDF file. For this reason, it can also be used as search criteria. You can specify the author, title, subject, and keywords of a document and create a note that appears on the first page of your PDF document that might contain an introduction or instructions for your PDF file. For more info on searching and cataloging a PDF file.
  • Hyperlinks: These commands let you specify the links you want to activate in your eBook and their appearance and magnification after conversion to PDF. Select all applicable link types in the Export Links area. If you haven’t defined these types of links in the PageMaker publication, the check box will be grayed out. Choose the Type, Highlight, Width, Color, and Style of your hyperlinks in the Default Appearance area. Note that most of these settings are more appropriate for PDF documents other than eBooks. Choose Fit Page in the Magnification drop-down list to have your linked destination page fit in the Acrobat eBook Reader window. Note that you can add, delete, and edit hyperlinks in Acrobat 6 after you’ve converted your eBook.
  • Articles/Bookmarks: PageMaker allows you to export text stories as PDF articles. It automatically finds these when you use the export command, and you can also define your own within the PageMaker story by clicking the Define button in the Articles area. If you’ve created index or table of contents links in your publication, you can convert these to PDF bookmarks by selecting the appropriate check box in the Bookmarks area. Select the Fit Page setting from the Magnification drop-down list to have your bookmarked destination page fit in the Acrobat eBook Reader window.
  • _ Security: You can select security settings for a PDF document, such as limiting access by assigning passwords and restricting printing and editing. Use these settings if you don’t plan to distribute your eBook commercially through an online retailer or distributor. Note that if you do plan to market your eBook, you must leave these settings blank because security for commercial eBooks is determined as part of the distribution process.
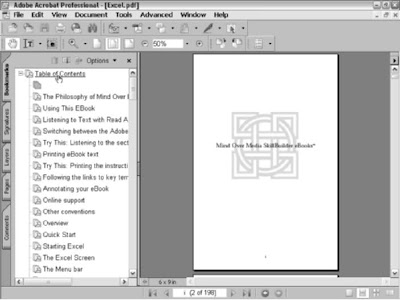
When the export job is finished, your new, tagged PDF opens automatically in Acrobat 6 for viewing. The first page of the document is displayed (in this case, the inside cover page of my Excel SkillBuilder eBook), and the Bookmarks palette shows the table of contents headings that were converted to PDF bookmarks. You can now test your links and use Acrobat’s PDF editing features to make final adjustments to your eBook. As of this writing, PageMaker 7.0 for Macintosh only runs in Classic mode on OS X. You can create an eBook as described in the previous sections, but when it comes time to exporting it to Acrobat, you’ll run into problems because Acrobat 6 only runs under OS X version 10.2.2 or greater. If you have Acrobat 5, start up in OS 9 and create your eBook in PageMaker 7.0 from that environment. When it comes time to export your eBook to Acrobat, do so using Distiller 5.0, save the eBook, and then open it in Acrobat 6 from the OS X environment. If you have InDesign 2.0, which is OS X and OS 9 compatible, you could convert your PageMaker eBook document with that program (or better yet, build your eBook in that program to start with), and then export the InDesign eBook document directly into Acrobat 6 under OS X.

Creating a tagged PDF file


When you’re satisfied with the look and feel of your eBook, your final step is to export the publication and its tags to PDF. The following steps show you how to export your PageMaker publication to PDF, which can then be opened up in Acrobat 6 for final adjustments prior to distributing your eBook:
  1. In PageMaker, open the publication you want to export to PDF. Note that if you’ve compiled your PageMaker publications into a book, you need to open the first publication in your Book List. This should be some element of the front matter, such as the table of contents. The Book utility takes care of sending the parts of your book in their correct order to Acrobat 6.
  2. Choose File➪Export➪Adobe PDF. Acrobat takes a few moments to configure itself for this task and then opens the PDF Options dialog box.
  3. Select options in the PDF Options dialog box. See the next section for details on specifying options that pertain to eBooks when exporting them to tagged PDF in PageMaker.
  4. Click the Export button to send your publication to Acrobat 6.

Using mixed page-numbering schemes


The main reason for using PageMaker’s Book utility to combine separate sections of your eBook is that doing so enables you to create different numbering schemes for those parts. A typical example is the way printed books use Roman numerals for their front matter (copyright, title, acknowledgment, and table of contents pages) and Arabic numerals for the body. Some books will also use different number formats for their appendixes and index.
PageMaker allows you to renumber pages in a single publication but not change their format, which works well for many types of publications. As an eBook publisher, though, it’s nice to know you can add these little details to re-create the look and feel of printed books.
To apply a different number format to one of your eBook publications, follow these steps:
  1. Open the publication you want to reformat in PageMaker.
  2. Choose File➪Document Setup, and in the Document Setup dialog box, click the Numbers button. The Page Numbering dialog box opens.
  3. Click one of the five radio buttons to select a numbering format and then click OK.
  4. Click OK to close the Document Setup dialog box and view your newly formatted page numbers in the document.
You can apply these steps to any other eBook sections as desired. The beauty of the PageMaker Book utility is that it compiles your eBook sections in the order in which they appear in the Book List and, at the same time, preserves all your links when you export the eBook to PDF.